Image Zoom experiment with revealjs
TL;DR
- Using the Accessibility functionality in OSX is the best method for zooming into an image.
- So no changes are required to my presentations, except for including the highest resolution version of an image I can find.
I used to do all my presentations with Apple Keynote. It’s a really nice piece of software. But increasingly I want processes where I can incorporate AI methods into the easily, and applications like Keynote make that difficult. I don’t want an application that generates presentations (various of that type of thing exist and I really dislike them) but I want to be able to prompt, for example, “Go through this presentation and make the speaker notes more concise”, or “Can you check this presentation and see if I have missed anything important, or if there are factual errors?”. Also I want to be able to generate some slides individually with AI, or have special processes to create certain types of slide. So for some months I’ve been developing slides using revealjs, and it’s working really well.
I did a presentation yesterday on Hell and the Devil in the Middle Ages, which included a lot of detailed images of artworks like this one:

In order to examine different parts of the images, I had made multiple slides zooming in on features, for example:

However, one person who attended said that since they had poor eyesight, it was still difficult to see some of the details. So it would be great to have a way to include images like this in my presentations, and to be able to zoom into them, perhaps with different levels of zoom. Let’s see if we can do that.
Firstly, is there is an appropriate plugin for revealjs? There is a built-in zoom plugin, which zooms into DOM elements using zoom.js. That’s neat, but not exactly what I want. I don’t want to have to create DIVs for all the areas I want to zoom in on. Whilst that would be neat, it would also be time-consuming.
In revealjs you can embed iframes that fill the whole screen. To do that you need to configure the slide like this:
<section data-background-iframe="image-content.html">
</section>
If you want to make it so that you can’t interact with the iframe content, you do this:
<section data-background-iframe="image-content.html" data-background-interactive>
</section>
Relevant revealjs documentation.
Ok so now I need a suitable Javascript image zoom thingy. Let’s see what is available.
The most appropriate seems to be OpenSeadragon. It’s actually designed for really big images. Having played around with it a bit, I have found this setup to work how I want it, more or less:
<!DOCTYPE html>
<html lang="en">
<head>
    <meta charset="UTF-8">
    <meta name="viewport" content="width=device-width, initial-scale=1.0">
    <title>OpenSeadragon Dynamic Image</title>
    <script src="openseadragon.min.js"></script>
    <style>
        * {
            margin: 0;
            padding: 0;
            box-sizing: border-box;
        }
        body {
            background: #333333;
            overflow: hidden;
            display: flex;
            justify-content: center;
            align-items: center;
            height: 100vh;
            width: 100vw;
        }
        #openseadragon {
            width: 100vw;
            height: 100vh;
        }
    </style>
</head>
<body>

    <div id="openseadragon"></div>

    <script>
        // Function to get URL parameters
        function getQueryParam(param) {
            const urlParams = new URLSearchParams(window.location.search);
            return urlParams.get(param);
        }

        // Get the image from the URL
        const imageUrl = getQueryParam("image") || "default.jpg"; // Default fallback image

        var viewer = OpenSeadragon({
            id: "openseadragon",
            tileSources: {
                type: "image",
                url: imageUrl,
                buildPyramid: false
            },
            showNavigator: false,  // Remove mini-map
            showNavigationControl: false,  // Remove zoom controls
            maxZoomPixelRatio: 10,  // Allow deep zooming
            zoomPerClick: 1,  // Prevent auto-zooming while dragging
            animationTime: 1.2, // Smooth animation duration
            springStiffness: 5, // Smoother animation
            gestureSettingsMouse: {
                clickToZoom: false,  // Prevent zooming when clicking normally
                dblClickToZoom: false, // Disable default double-click zoom
                pinchToZoom: true,
                flickEnabled: false, // Prevent accidental zooming with flicking
            }
        });

        // Click-to-zoom behavior: Zooms toward the cursor position without centering
        viewer.addHandler("canvas-click", function(event) {
            if (!event.quick) return; // Prevent click triggering when dragging

            if (event.originalEvent.shiftKey) {
                // SHIFT + CLICK → SMOOTHLY ZOOM OUT & CENTER IMAGE
                let homeZoom = viewer.viewport.getHomeZoom();
                let homeCenter = viewer.viewport.getHomeBounds().getCenter();
                viewer.viewport.zoomTo(homeZoom, null, false); // Smooth animated zoom out
                viewer.viewport.panTo(homeCenter, false); // Smooth animated centering
            } else {
                // NORMAL CLICK → ZOOM IN TO CURSOR WITHOUT CENTERING
                let zoomFactor = 1.5;
                let viewportPoint = viewer.viewport.pointFromPixel(event.position);

                viewer.viewport.zoomBy(zoomFactor, viewportPoint); // Zoom at cursor position
                viewer.viewport.applyConstraints();
            }
        });
    </script>

</body>
</html>
This is designed to use used in a revealjs slideshow like this:
      <!-- iframe Slide (Fullscreen) -->
      <section data-background-iframe="display-image.html?image=orvieto-large.jpg">
      </section>
However, having played around with just zooming using the built-in zoom capability in Safari using the trackpad, I’ve decided I prefer that. In order to do that all I need to do is like this:
<section data-background-image="orvieto-large.jpg">
</section>
It doesn’t allow you to zoom in beyond 1:1 pixel ratio. But this is possible using OSX system settings, ticking the “Use scroll gesture with modifier keys to zoom”.
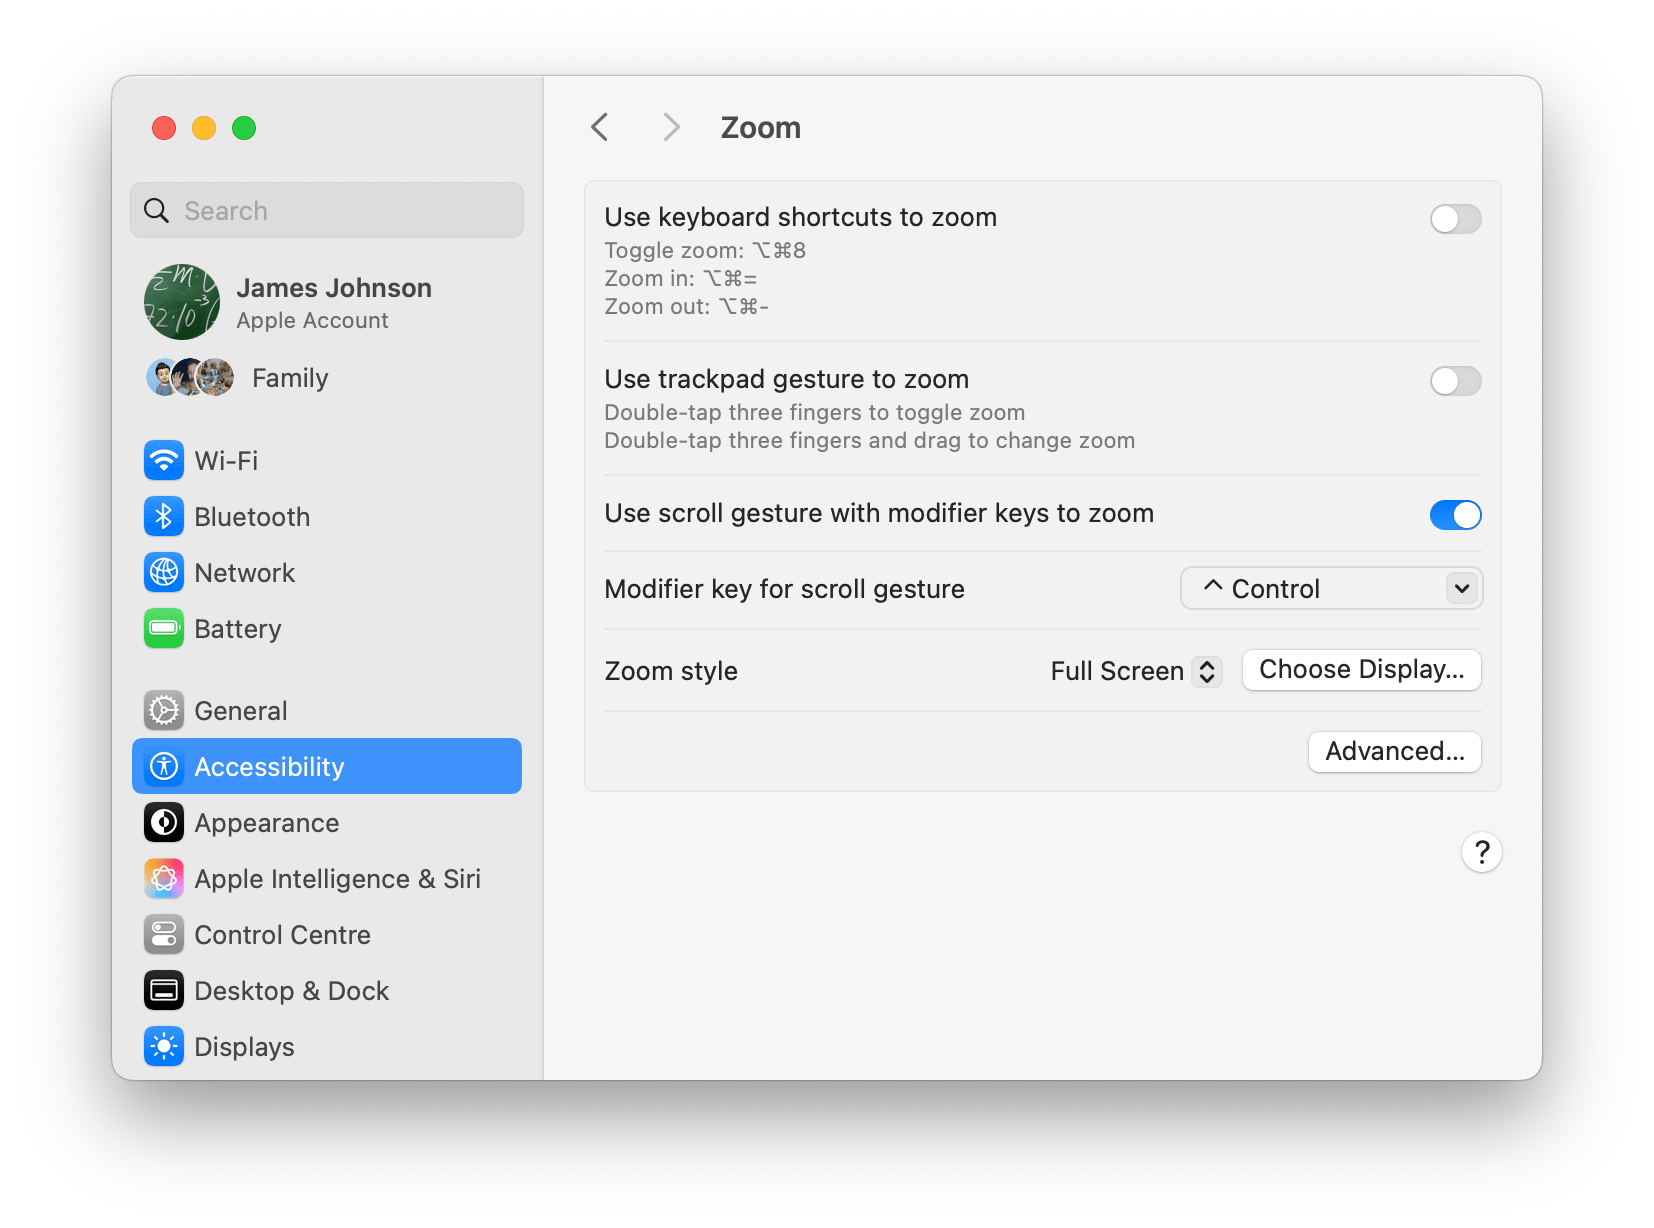
So that’s fixed! No need for anything fancy. I like simplicity.